
Craft Glue is one of the most useful supplies you can keep in your craft box. It joins paper, wood, cloth, and many other materials with a clean finish that does not show ugly marks later. When you pick the right craft glue and use it the smart way, your projects stay together longer and look neat from the start. Many people struggle because they grab any glue without thinking and then feel upset when pieces come apart or glue shows through thin paper.
You do not need fancy tools or special skills to get good results. Craft glue works well for both quick fun makes and bigger projects that you want to keep for years. It dries clear on most surfaces and gives you time to fix mistakes before it sets hard. With a few simple steps you can avoid common problems and enjoy making things without worry or waste.
What Makes Craft Glue Different From Regular Glue
Craft glue is made to work on the kinds of items you use in creative projects. It forms a strong bond that stays flexible so your work does not crack when you move it. Unlike regular office glue, it handles light wood, fabric, and foam without soaking through or leaving yellow stains over time. You can spread it easily and it cleans up with water while still wet.
This type of glue helps you finish projects faster because it matches the job you are doing. For example, you can make greeting cards, small models, or fabric decorations without fear of the pieces falling apart later. Craft glue also dries mostly clear so your final piece looks tidy and professional. You save money too since one bottle lasts through many different crafts instead of buying several kinds for each task.
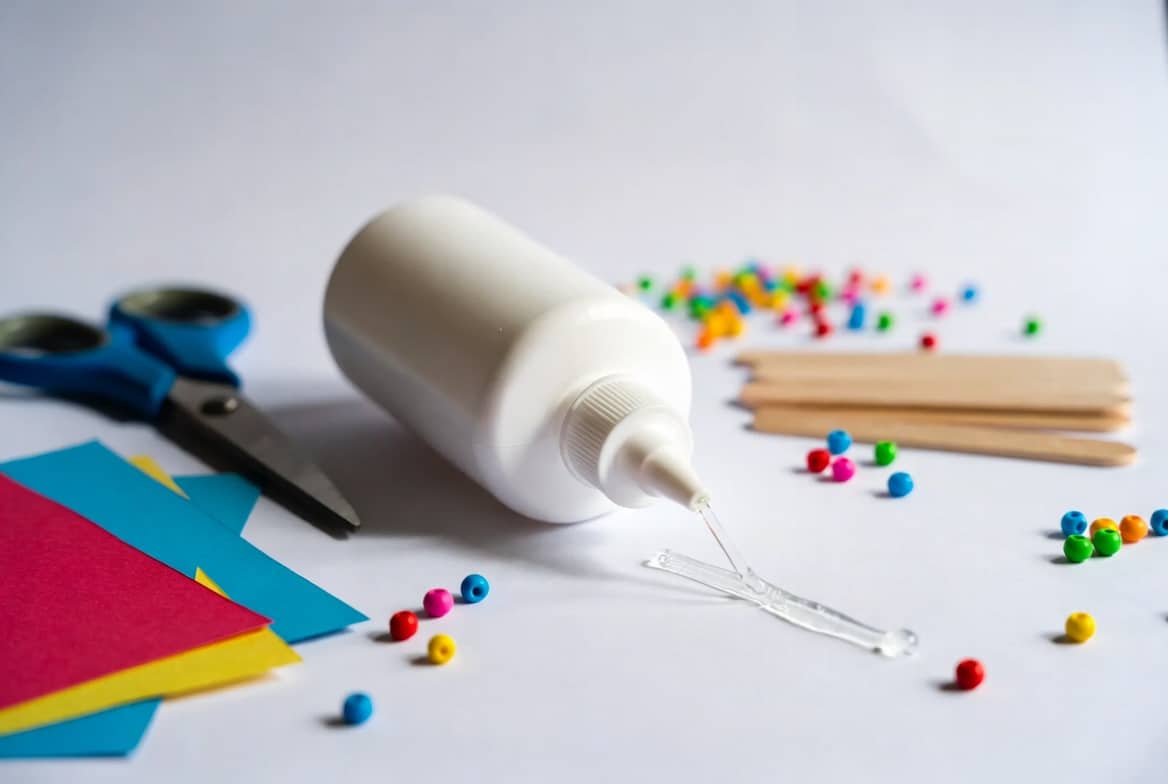
Points To Note
- Read the label first to match the glue with your material. Test on scrap pieces before starting. Use only a thin layer to avoid mess. Wait the full drying time.
- Keep the nozzle clean after every use. Store the bottle upright in a cool dry place. Check the glue every few months. Buy small sizes first if you are new.
Different Kinds Of Craft Glue You Will Use Often
White craft glue is the everyday choice for most paper and light wood projects. It spreads smoothly from a bottle and gives you time to move pieces into the perfect spot before it sets. This glue dries clear and stays a bit flexible so your cards or models do not break when handled. You can wash it off your hands and tools easily while it is still wet.
Hot glue comes in sticks that you melt in a glue gun and it sets in just a few seconds. It holds heavier items like beads, ribbon, or small wood pieces and works well when you need speed. Many makers keep both white craft glue and hot glue ready because each one solves different problems. You get the best results when you match the glue type to the speed and strength your project needs.
How To Choose The Best Craft Glue For Your Project
Look closely at the materials you want to join and pick craft glue that matches their needs. Paper and thin fabric need a light glue while thick wood or mixed items need stronger hold. Check the drying time on the label so you know if you have enough time to adjust your pieces. This simple step stops most problems before they start and helps your finished craft look clean and strong.
Think about how you like to work and how much time you have for each craft session. Some craft glue sets slowly so you can move things around while others dry fast for quick results. Compare the size of the bottle to how often you craft so you do not run out or waste money on too much. You feel more confident when the glue fits both your materials and your working style.
Easy Ways To Apply Craft Glue Correctly
Start with clean and dry surfaces because dirt or moisture stops craft glue from making a strong bond. Spread a thin even layer using a brush or the tip of the bottle so you cover just the area you need. Press the two pieces together right away and hold them steady until the glue starts to set. This method gives you a neat bond that looks good and holds tight for a long time.
Work in small sections when your project is big so the glue does not dry before you finish joining everything. Keep a clean damp cloth close by to fix any small spills quickly and keep your hands tidy. For hot glue move the gun steadily to avoid messy strings or burnt spots. You will see better results each time as you learn the right amount and speed for the craft glue you are using.
Common Mistakes To Avoid With Craft Glue
Many people put on too much craft glue thinking more is better but it often oozes out and creates ugly bumps or soaks through paper. This wastes glue and leaves marks that are hard to hide later. Always start with a thin layer and add only a little more if needed after a quick check. You keep your projects looking clean and you save supplies when you follow this simple habit.
Another frequent mistake is not waiting the full drying time and then moving the pieces too soon. The bond breaks easily and you have to start the project again with new materials. Read the drying instructions every time and use a timer if you need to. This small step stops most failures and gives you strong lasting results with your craft glue.
Points To Note
- Never mix two different kinds of craft glue on one project. Keep glue away from small children without watching. Do not store open glue near food. Throw away old glue that looks thick.
- Keep your work area dry. Wipe your hands often. Test the finished piece after full dry time. Learn from each mistake for the next project.
How To Store And Care For Your Craft Glue
Keep your craft glue in a cool dry place away from windows and heaters so it stays smooth and easy to use. Always close the cap tightly after every use and stand the bottle upright to prevent leaks or drying inside the nozzle. Wipe the tip clean with a damp cloth before you put the cap back on. This simple care keeps the glue flowing well and strong for many months of crafting.
Clean your tools and any spills right away with water for white craft glue or the right cleaner for hot glue. Dry brushes and gun tips completely before you store them so they do not stick together. You avoid waste and mess when cleaning becomes part of your normal craft routine. Your craft glue stays fresh longer and your workspace stays neat and ready for the next creative session.
Craft glue becomes a reliable helper once you know how to choose it, apply it, and take care of it. You can now create with more confidence and see clean, strong results in every project you make.


Leave a Reply